Introduction: composting

Above, the main composter. A composting structure, like other gardening
structures, should preferably have more than one function, if the
supplementary functions don't compromise the primary function. This
composter can be used for plant support whilst continuing to make compost.
Here, the roof of the composter supports winter squash plants:
/Capturecomposter.JPG)
The composter can be used for protected cropping, as a kind of cold frame,
whilst continuing to make compost. The wooden roof is replaced with
polycarbonate or PVC sheeting. This aids compost-making by the greenhouse
effect - the temperature inside the composter is raised. A simple supporting
structure can be fitted inside the composter. It supports a growing
container fairly near the upper surface. The plants growing here will
benefit from the increased temperatures.. There's plenty of room for
compostable materials below the supporting structure.
There are TV programmes which pretend otherwise,
but fruit and vegetable gardening on any scale, for any length of time,
involves disappointment as well as fulfilment. The harsh realities
come in many different forms: weeds, the worst of which can seem like one of
nature's bad jokes, although it would be difficult to see the funny side of
Japanese knotweed or
some other weeds, pests - insect, bird, mammal, human (allotment vandals
included here in the category of pest), plant diseases, pests which
spread plant diseases such as aphids, weeds which are the hosts of
disease-causing organisms (yet another disadvantage of weeds), watering in
times of drought, the time-consuming watering which isn't just a token
gesture but enough to satisfy the voracious thirst of potatoes and other
crops and ensure a good yield (subject to potato blight and perhaps other
diseases), the difficulty of obtaining a good yield.
Even if most things go well (it's unlkely that all things to go well -
if temperatures are right and rainfall is just right, not too much, not too
little, things are going well for the weeds as well) then there can still
seem a disproportion between effort and yield. Some crops are markedly
superior to others in this regard. Runner beans give a better yield than
broad beans, courgettes give a better yield than peas.
Composting gives a low yield. The disproportion between effort and
yield is very marked. A huge mass of compostable material gives not nearly
as much compost as the gardener would like or the soil needs. To collect a
huge mass of compostable material in the first place is very often
impossible, or requires so much effort. The end product is very desirable, but
its contribution to soil fertility is more peripheral than central.
In economics, there's a great gulf which is often cited, the gulf between
infinite wants and scarce resources. In gardening, there's a gulf between
the needs of the soil and the scarce resources of compost.
Every gardener should compost - it would be a breach of gardening ethics
in most cases not to compost material which can be composted, or have the material which could be composted transported
to a distant site - but a gardener has to be careful
not to give too much effort to composting at the expense of other gardening
tasks, and non-gardening tasks and duties, for that matter.
There are many dedicated composters, as well as fanatical
composters, who devote great effort to securing diverse materials to build a
well-balanced heap and who turn the heap to ensure that the heating effect
continues. At the end of it all, the compost they produce is still a
marginal product. Manure, unlike compost, is generally
obtainable in large mass and makes correspondingly greater contributions to
soil structure and soil fertility, despite the lower concentration of plant
nutrients in manure. Composting should be viewed as a gardener's duty, an
absorbing interest as well, perhaps, but no more than that, and
certainly not the semi-sacred preoccupation of some organic gardeners.
My discussion here is in accordance with this thinking. I discuss ways of
increasing the supply of compostable materials and ways of saving work -
the work of bulk handling, when compostable materials are available in
quantity, and work once the composting process is under way. I also
discuss compost containers - plastic, traditional wooden, and the composters
I use myself, designed to minimize the effort in producing compost: this
valuable material, but one whose worth can easily be exaggerated.
So far as possible, composting should be integrated - unobtrusively, as I
see it - into the other aspects of gardening. I discuss some gardening
techniques which have a linkage with composting, such as hedge-cutting and
weed clearing. Although nettles are a much finer compostable material than
hedge clippings, hedge clippings may well be obtainable in much
greater masses than nettles.
As well as the composter above, I use composting systems which have a larger area than most of
the ones commonly used, including hedge composting (there's also wall
composting and fence composting). These techniques don't make use of a
compost bin.
These are all forms of composting at a boundary. I use hedge composting
in both the upper growing area and the lower growing area, in both cases
near to a privet hedge. I use a long strip of land next to the hedge, about
035 m wide, as a long composting area. The hedge forms one of the long
sides. The other long side is formed by boards supported by stakes, the
system explained on the page beds and boards. This
is a very flexible system. The boards can be moved very easily, for example
nearer to the hedge or further away. When I work on beds near to
the hedge, it's convenient to throw weeds and other suitable materials into
this composting area by the side of the hedge rather than to take them to a
compost bin or to put them in a wheelbarrow which then has to be wheeled to
a compost bin. The materials are out of the way and if they're the least bit
unsightly, grass or other things can be thrown on them to cover them up. The
compost materials will play a part in hampering the sideways growth of the
privet hedge. - these hedges grow outwards as well as upwards, of course.
Whenever the hedge is trimmed, clippings fall onto the compost area,
increasing the compostable material and avoiding the need to transport the
clippings to a separate composter. Other boundaries, walls and fences, have
similar benefits, except, of course, the benefits of restricting growth and
the benefits of clippings, unless a fence supports climbing plants which are
sometimes trimmed. I can't claim that this is an important source of
compost, but it makes a contribution and it has a range of other benefits.
Upward growth of one of the privet hedges is checked by a novel technique -
using the top of the hedge as a growing bed! It retains most of the growing
medium during a growing season. Since roofs are often used for growing, why
not use the tops of hedges? I'm not a great admirer of privet.
View inside the greenhouse, showing some of the tomato plants, October 29,
2018. The courgette and squash plants, the runner bean and Borlotti bean and
French bean plants were cleared a few days earlier, after harvesting the
crop. The tomatoes had already been harvested and the time had come to clear
the tomato plants. All these plants, of course, were placed in one or
another composting area.
In previous years, I haven't used the greenhouse for growing crops during
the winter. After spending so many hours during the warmer months, I've
tended the outdoor winter crops, such as purple sprouting broccoli, but
spent much more time on activities other than the tasks (or pleasures)
associated with growing, such as updating the gardening pages of this
site.
This year, I decided to retrieve compostable material and place it in the
greenhouse, so that breakdown of the material could take place faster - not
protected growing but protected composting. As the primary function of the
beds is for growing tomatoes (I also grow a French bean or Borlotti bean
plant in the summer months) then tomato plant residues are excluded. To add
tomato plant residues to the soil inside the greenhouse would be mistaken. I
don't need to obtain fresh soil for the greenhouse every three years, to
avoid tomato plant diseases, as I grow grafted tomatoes in the beds (as well
as non-grafted tomatoes in peat-free comost in containers.)
Obtaining compostable
material and bed-extension
To
begin with, I emphasize the well-known fact that cooked food, bread, cheese,
anything that omnivorous rats can eat, should never be regarded as
compostable.
Even a large allotment or garden
produces a very modest supply of compostable material, and even in autumn, when
such plants as runner bean, courgette and tomato are generally available for
composting.
Anyone who takes on an overgrown,
neglected garden or allotment is fortunate, although it may take time
to realize this. An overgrown hedge 5 metres or more high is a great asset.
Placing a composter near to a hedge like this is often a good idea, or
composting near to it without using a composter.
I've made extensive use of twigs and
the smaller branches from nearby hedges to extend the growing area:
'bed-extension.' This is a form of composting. The twigs and branches form
an open network, allowing weeds to continue growing for some time (the weeds
include grasses, and not just 'weed-grasses' such as couch grass.) The weeds
contribute nitrogen, helping to offset the woody twigs and branches, which
are high in carbon. I place a thick layer of manure over the twigs,
preferably manure in clods or coarse pieces, which will remain on top of the
twigs and branches and not fall through. Some of the nitrogen in the manure
is washed away to the deeper level and helps to speed up the breakdown of
woody material. In less than a year, crops can be grown in the area,
although not crops such as carrots, which are harmed by manure. Soil is
spread on the manure before planting. Only a thin layer is needed.
Books and articles often stress the
need for a mixture of materials, giving a good balance of textures and a
suitable ration of nitrogen to carbon. What they don't stress is the
disproportionate effort often needed to ensure this, the difficulty of
obtaining sufficient of these varied and contrasting materials. A compost
heap made up almost entirely of hedge cuttings, high in carbon, with a very
open texture, despite the leaves, is well
worth having and certainly much better than nothing. There's no need to
worry unduly, or at all, about bringing up materials with a less open texture, with a
greater concentration of nitrogen, if they are unobtainable. In time, the hedge cuttings will form
good compost, even if, as always, there isn't enough of it.
Lawrence D Hills claims (in his
classic but flawed and outdated book 'Organic Gardening') that hedge cuttings thicker
than a pencil won't decay in a compost heap. This isn't true, of course -
given enough time, all wood will decay, whatever the size - but it's a good
rule for the short term.
A powered hedge cutter or shears can
be used for mildly overgrown hedges, but for grossly overgrown hedges, I've
used a different tool, a small hand-saw and loppers. I use loppers to detach
many of the smaller branches, giving access to the larger branches, which I
saw away. Before very long, a grossly overgrown hedge has been reduced
to a short, very bare-looking one, which will, however, revert to its
previous size if allowed. A powered brush cutter or chain saw can avoid some
but not all of this work.
During the season when the pictures on
the page Photographs 2 were taken, I spent a very great deal of time constructing the
wooden paths, designing and constructing the raised pond and composters
shown on the right, designing and constructing transframe, and on all the
other work of the allotments - and, amongst other things, watching the
flight of swifts. There was no time to see to the privet hedges, which grew
to a great height. When I did cut them to a fraction of their overgrown
size, I piled up the cut material:
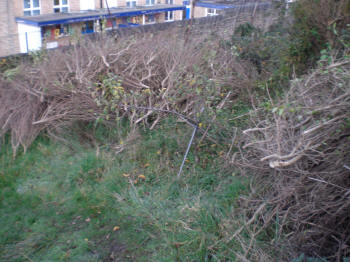
This is an area which, like the area occupied now by the raised pond and
composters, and adjoining it, was obviously used as a dumping ground at some
time in the past. Plastic, glass and metal were visible. The soil was only
of an adequate depth in one very restricted area, where I planted an
apple tree, just visible, with its supporting stake, in the photograph
above, taken
later in autumn.
Since the photograph was taken, I've
added a thick layer of manure and a thin layer of soil and the bed is now
available for planting. Without an enormous amount of effort, a large bed
has been created. I've followed the same procedure to make a second, smaller
growing bed.
When possible, composting should be in situ, or not at a great distance from the compostable
materials. Bulky compostable materials should so far as possible
be composted near to the supply of bulky compostable materials. Composting
can often be carried out at the place where compost will be needed -
composting on the growing bed, or the weed-infested ground which will be
converted to a growing bed. A compost bin can often be placed on a
particularly rampant area of weeds. They will continue growing for quite
some time and well benefit the mix of compost materials, without any effort
in cutting and transporting them. There are any
number of other activities which can be carried out in the time saved.
Disadvantages
of plastic composters
Plastic
is generally the best material to use for a water butt - making a watertight
wooden container isn't an easy matter - but not at all the best material to
use for a compost bin, even when the plastic is recycled. There are various
objections to the use of plastic compost bins:
- Recycling plastic uses
large amounts of energy. This energy cost has to be set against the environmental
benefits of breaking down kitchen or garden waste into compost in a plastic
bin. The resources a plastic container wastes can be considered more
significant than the ones it saves.
- Unlike metal or glass,
which can be recycled many times, plastic in general can only be recycled
once, due to contaminants. It's very probable that the plastic will end
up in a landfill site sooner or later.
- Plastic is discordant
in a garden or allotment, a synthetic material at odds with organic life.
It's far better to restrict its use to things such as water butts where
plastic is obviously the best material to use.
- Wooden bins are far
more flexible than plastic bins, and can offer better insulation when they
are placed next to each other. Three wooden bins can be placed in contact,
giving the same benefits for heat insulation as three terraced houses in
a row, which insulate each other. Three plastic bins are only available
separately (although it would be quite easy to manufacture a set of three
adjoining plastic bins) and have the same disadvantages for heat insulation
as three detached houses. If a large amount of composting material becomes
available, the volume of a plastic container can't be increased to take
all the material.
I used a Rotol plastic
composter for a time, many years ago. It can produce very good compost and
the design has undeniable appeal - a conical shape which looks very good.
For all that, the Rotol has the disadvantages of other plastic composters.
The top diameter is 45cm and through this fairly small opening all the compostable
material has to be inserted (after being lifted up to a height of around 75cm.)
The Rotol composter is made of unrecycled plastic.
Composters, then, if at
all possible, should be made from a renewable resource, wood, and if it can
be obtained, reclaimed wood.
The main
composter
This is an improved wooden composter. One advantage is that it can be placed on sloping ground.

The upper surface of the composter can be of varied materials. The
version shown in the image towards the top of the page has an upper surface
made of wood. This can be replaced with a PVC top is dual-function. It
can be used for rainwater collection, if the composter is on sloping ground
- the slope may be a very gentle one - fand or increasing the temperature inside the
composter. The greenhouse effect increases the temperature inside polytunnels and cloches as well as greenhouses, but it can also be used to
increase the temperature inside a composter. The biological processes which
produce compost are speeded up and the compost is made in less time.
When the composter is empty - and when the composter is almost full -
materials for composting can be grown inside the composter to make a
contribution to the common problem, lack of compostable materials, and
the PVC panel enables them to be grown more quickly.
The composter is solidly constructed and large but it can be moved from
place to place without difficulty, after it has been dismantled. (When I
constructed a solid and large workbench for my workshop, I designed it to be
easily moved. The bench can be raised using a hydraulic jack, castors can
then be fitted and the bench can be moved from place to place.
Alternatively, the bench can easily be dismantled and the separate parts
taken to a different location and reassembled.)
Turning
the heap
The Centre for
Alternative Technology's Factsheet on composting is completely realistic in stating that
very few people turn the compost heap, even if they have gone to the trouble
of forming a heap which has heated in the first place. The heap is turned - if
at all - after the temperature has reached a maximum and has then begun to
fall. This is because moving such a heavy load deters almost all but
physically strong and very committed people. Cold composting, which may take a
year or more to make compost, is the dominant method of making compost now,
and not just because, unlike cold composting, it doesn't require a large mass of material
to start off the heating process. It requires far less effort
than hot composting.
When the
improved wooden composter is placed on a slope, then the physical effort
required becomes easier. Gravity aids the process of moving the material and
whilst the material is being moved, mixing and re-distribution take place.
Growers who use a sloping composter will find that the system makes hot
composting more practicable. Hot composting has great advantages. It can
make compost in about six weeks and is far more efficient in killing
disease organisms and weed seeds. Using a
sloping composter, gardeners may well find that hot composting doesn't
require enormous effort.
Other aspects of
composting
I don't deal here with large-scale composting, the
composting systems needed if compost is to be sold, the composting systems
subject to legislation, the composting systems which require an energy input
(such as the composting systems produced by Accelerated Compost Ltd) with
in-vessel composting systems in general.
The
advantages of the restrictions? The advantages of composting in the garden
or allotment, rather than sending the material to an in-vessel composting
system, are very substantial ones. Compostable materials are mainly water,
and transporting heavy masses of water - along with the valuable organic matter
- may make economic and environmental sense, or it may not. Not if the distance
is great. Like paper recycling, organic waste recycling can have great benefits,
negligible benefits or no benefits at all, and one of the most important considerations
is the distance the compostable material has to travel - the 'composting miles.'
The reason is to do with use of fossil fuel, of course. In situ composting,
composting in the garden or allotment, has the advantage of composting distances
amounting to yards not miles.
Another
advantage of in situ composting is the benefit to wildlife, unless the composter
is a closed vessel, such as a compost tumbler. The composter as a valuable
wildlife habitat is often overlooked, but Ken Thompson's very lively, very
interesting and very informative book 'No Nettles Required: the reassuring
truth about wildlife gardening' outlines the advantages to wildlife. Ken Thompson
is a researcher at Sheffield University and his book gives some of the findings
of the 'BUGS project.' BUGS stands for 'Biodiversity in Urban Gardens in Sheffield.'
The project was supported by the major government funder of environmental
research, the Natural Environment Research Council.
Of
compost heaps, he writes (Page 76, 77): 'Unfortunately, the BUGS project had
neither the time nor the money to look at compost heaps in detail, but other
research (much of it from Scandinavia) reveals that compost heaps are hugely
important wildlife habitats in their own right. This is because warm, decaying
plant material is a habitat that would otherwise be absent from gardens. Reptiles
in particular like these conditions, and a survey in Bristol found that gardens
with compost heaps were twice as likely to have resident slow worms as those
without compost heaps. Given the appetite of slow worms for slugs, this has
to be another good reason for starting a compost heap...compost heaps go a
long way towards replacing a whole catalogue of wildlife habitats that would
otherwise be rare or absent from gardens, and are increasingly rare in the
wider countryside. Another interesting feature of compost heaps is that by
providing a warm, insulated habitat, they allow many species to spread further
north than they would otherwise do. Many native species live further north
in compost than in any other habitat...' And, in a summary box: 'Compost heaps
are...a uniquely valuable wildlife habitat...No gardener with any interest
in wildlife should be without one, however lacking you may be in the raw materials.'
Using the right tool
Using the right tool saves a great deal of work in compost making,
as in other gardening activities. In this case, the correct tool is a manure
fork. 'The Organic Gardener's Handbook' by Margaret Elphinstone and Julia
Langley' is excellent, and has a very informative chapter on tools. This is
their section on the manure fork:
'The manure fork is related to the pitch-fork, designed to lift material
and throw it or load it somewhere else. It is the most useful tool for
building compost heaps. You can use it to load seaweed into sacks on the
beach, to throw muck into a trailer, to mix up your weeds and grass mowings
into a good compost ... It is a pleasant tool to use properly, because when
rhythm and balance are right there is very little strain involved. You can
shift a ton of manure with no aches to show for it, and work comfortably all
day with it at a steady pace.
'Manure forks have four or five rounded prongs which curve upward, and
the prongs are set at an angle to the shaft to assist the lifting movements
for which it is intended. If you cannot find a manure fork at your garden
suppliers, try an agricultural store.'
Hedge, wall and fence composting
These are all forms of composting at a boundary. I use hedge composting
in both the upper growing area and the lower growing area, in both cases
near to a privet hedge. I use a long strip of land next to the hedge, about
035 m wide, as a long composting area. The hedge forms one of the long
sides. The other long side is formed by boards supported by stakes, the
system explained on the page beds and boards. This
is a very flexible system. The boards can be moved very easily, for example
nearer to the hedge or further away. When I work on beds near to
the hedge, it's convenient to throw weeds and other suitable materials into
this composting area by the side of the hedge rather than to take them to a
compost bin or to put them in a wheelbarrow which then has to be wheeled to
a compost bin. The materials are out of the way and if they're the least bit
unsightly, grass or other things can be thrown on them to cover them up. The
compost materials will play a part in hampering the sideways growth of the
privet hedge. - these hedges grow outwards as well as upwards, of course.
Whenever the hedge is trimmed, clippings fall onto the compost area,
increasing the compostable material and avoiding the need to transport the
clippings to a separate composter. Other boundaries, walls and fences, have
similar benefits, except, of course, the benefits of restricting growth and
the benefits of clippings, unless a fence supports climbing plants which are
sometimes trimmed. I can't claim that this is an important source of
compost, but it makes a contribution and it has a range of other benefits.
Rainwater collecting:
introduction
Gardeners in arid areas have always had to find ways of saving water. Now,
in this country, rainfall isn't taken for granted, and there's more and more
interest in ways of conserving water. In this section, I discuss amongst
other things ways of collecting rainwater from hard surfaces such as paths.Gardeners in arid areas have always had to find ways of saving water. Now,
in this country, rainfall isn't taken for granted, and there's more and more
interest in ways of conserving water. In this section, I discuss amongst
other things ways of collecting rainwater from hard surfaces such as paths.
Techniques and equipment which don't work or which require an
effort completely disproportionate to the results should be abandoned
or modified or at least recognized for what they are: token gestures. An
example: water butts, intended to make a contribution to water collecting.
Their contribution is negligible. This is for the obvious reason that the
collecting area is very small. For a water butt with a diameter at
the top of 0.4 m (there are many water butts with smaller diameters than
this), the collecting area is only about 0.12 square metres. In general,
even five water butts will collect a negligible proportion of the rainwater
which falls on a growing area and will make a negligible contribution to
satisfying the demand for water. Virtuous feelings of contributing to
'conservation of resources' aren't sufficient justification.
Water butts are most useful for storing water which has been supplied
by a tap - if, of course, a mains water supply is available. There's a water
tap near to my allotments, but the supply of water has sometimes been
interrupted and this has happened in spring, during a period of extended
drought, when I was planting asparagus and other crops, I used up all the
water in the large tank which stores water collected from the greenhouse
roof, which holds 1 000 litres (a tonne of water) and after that, my only
supply of water came from the small pond in the upper allotment. Since then,
I've extended the facilities for water collection and storage in the ways I
describe here. If gardeners in this country can't take for granted an
assured supply of mains water and adequate rainfall, gardeners in arid
climates face much greater difficulties, of course. It's possible to collect
only a proportion of the rainwater which falls on a growing area or an area
near to the growing area. It's obviously not possible to make the whole of a
growing area into a collecting area, but it's necessary to have available
collecting areas much larger than the collecting area of a water butt, or a
number of water butts. I use paths and reservoirs to collect water.
Rainwater collecting:
using paths

In this photograph, just visible, on the left, is a black water butt in my
lower allotment. The water butt collects a little water but its main use is
to store water from a much larger collecting area. (The wooden structureto
the right of the water butt is a transframe, shown
here with only a PVC top-panel, no side-panels. The PVC top panel can be
fitted with a section of guttering and can be used for water collection
too.) The two principal hard surfaces shown in the photograph
are the two paths constructed from wooden boards, with raised wooden
edging. I've laid down heavy-duty plastic sheet material on the path on the
left and covered it with netting (not clearly visible in the photograph) so
that it's possible to walk on the path without slipping. The rainwater which
falls on the path runs down into a container at the bottom of the
path, buried in the soil. A wooden board covers the container. Containers of
very large capacity are obtainable which can be buried in the soil, but the
container here is much smaller. At intervals, I pump the water from the
buried container into the water butt, using a hand pump. The pump can be used to pump water to growing areas or other
water storage containers uphill. Alternatively, a watering can can be
submerged in the water container. This is often a convenient way of using
the water.
This method of collecting water wouldn't be possible in the case of a path
which is on level ground, but the slope needn't be at all steep. Paths on
gently sloping ground can be used for water collection.
The system shown can be regarded as a prototype, but the only
improvements needed are to do with appearance, not functionality. The system
works perfectly, and the volume of water collected is substantial - given a
modicum of rainfall, of course.
More recently, I've developed techniques, not described here, for rainwater
collection which don't require the conversion of paths.
Rainwater collecting:
a raised reservoir / pond
The image shows another large water collecting surface, a reservoir.

The bulky material on either
side of the reservoir withstands the pressure exerted by the water in the
reservoir. There are supporting structures hidden from view but these
are cheap and simple to make. Their role is to support and keep level the
rectangular edging of the reservoir. The reservoir can be constructed on
sloping as well as level ground - the ground here is sloping and uneven - and doesn't
require a wall as the boundary on one side. It can be constructed anywhere
in a growing area, in fact.
The wall here is south facing, so this is a very favourable situation for
growing, but the soil in this area is very thin. Beneath it is a deep
accumulation of rubbish which must have been deposited a long time ago -
broken glass, rusting metal and plastic. The beds on either side of the
pond allow crops to be grown here now.
The reservoir is functional. A primary function is collection of rainwater
which can be used to irrigate crops, using the handpump, water syphoned from
the reservoir or a watering can. It would also be possible to add an
overflow system which includes piping. It's intended, though, to be more
than functional, a pond So, one of the things I've planted in the pond
is the native white water lily, Nymphaea alba (dormant at this time of
year, of course). The rectangles of soil and water form an effective
contrast, I think.
This shows the areas of the water-collecting surfaces in my allotments in square metres.
water butt 0.4
small pond 0.7
PVC top-panel of transframe 1.5
reservoir 2.7
water-collecting path 6.3
greenhouse 36.5
The greenhouse is a comparatively large one, over 11 metres long. Growing
areas are water collecting areas as well, of course, but not the growing
area inside the greenhouse. The large contribution to water collecting made
by the greenhouse roof is subject to this {restriction}, then: not all the
water collected by the greenhouse roof can be used in other areas.
The water collecting path is narrow. Adding a water collecting surface
to the wider and longer curved path to the right would increase the water
collecting surface significantly. The method used for a straight path has to
be modified for a curved path but is straightforward to implement.

/water1778.jpg)
/water1777.jpg)
/water1784.jpg)
/water1758.jpg)
/water1782.jpg)
/DSCF1762.jpg)
/water1789.jpg)

/Capturegreenhouse.JPG)