Van - campervan conversions and mobile architecture


The first conversion here is a conversion of my Volkswagen Caddy van.  The second is a conversion of the Citroen Berlingo van I used to drive.


Photographs of the prototype, 28 September, 2020, here,  parked in the street, followed by photographs of the campervan at a campsite in Derbyshire.


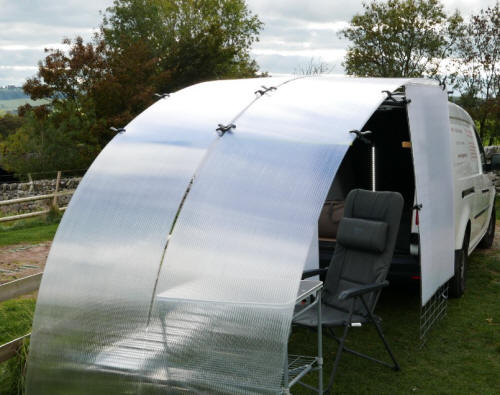
Below, the van with campervan extension at a farm campsite near the village of Great Longstone, Peak District, Derbyshire. During my stay,  I made changes to the design which don't alter the appearance very much but which are  improvements. Before the changes, the open rear doors helped to support the two vertical polycarbonate sheets nearest to the doors. After closing the doors, these sheets lose the support of the doors. I already had a solution available, to ensure that the vertical sheets form a self-supporting structure - the use of guy ropes, attached to the metal mesh panels which are linked with the polycarbonate sheets. This allows the doors to be closed without the structure collapsing.  I used the 'furniture' inside the extension to give support to the vertical polycarbonate sheets - not the chair shown here, but the kitchen unit in front of the chair , which was moved to the back of the extension, next to the door shown, the driver's side of the vehicle,  with clamps to ensure a secure coupling. The long, low horizontal aluminium component to the left of the kitchen unit didn't need to be moved. The end nearer to the back of the van, which can't be seen here, was already in the correct position. Clamps ensure a secure coupling with the metal mesh panel next to the vertical polycarbonate sheet on the left side - the passenger side - of the vehicle.


Below, photograph of part of the campervan extension, the part not visible in the photograph above - the vertical polycarbonate panel connected to a metal mesh panel, which is next to the passenger side rear door - and, also another vertical polycarbonate panel and metal mesh panel linked with it. Photograph also taken at the Great Longstone campsite. The dark horizontal towards the lower edge isn't part of the campervan extension. It belongs to farm fencing.
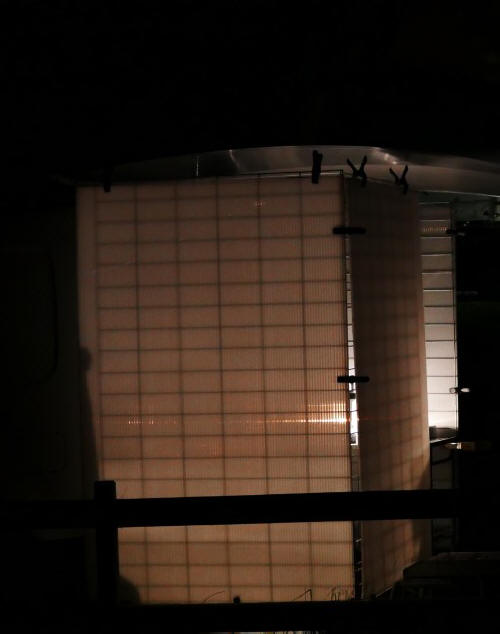


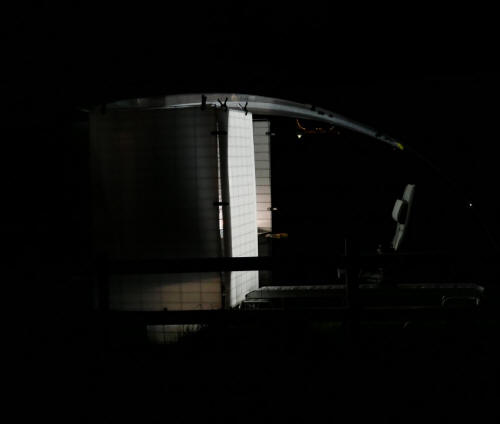
Below, a wide-angle photograph taken from much the same position:


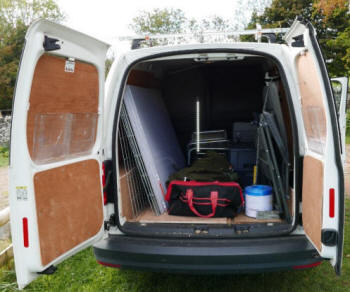
Below, photographs showing the components of the campervan conversion including, on the left of the van interior, the wire mesh panels and polycarbonate sheets  which form the straight walls of the extension. All these are easily stored and transported inside the van, leaving plenty of space for the other things needed for camping. The polycarbonate sheets shown on the ground fit into the van easily when they have been formed into curves. At the site, these sheets are connected in pairs with clamps, curved and then put in place to form the rear curved walls of the extension. The upper pair are held in place by the rear roof racks of the van and the lower pair can be held in place by a variety of methods - small ground anchors, tent pegs or by improvised objects - at this campsite, I made use of a concrete block already at the pitch and a box from inside the van.


Campervan conversions give rise to very interesting design problems and opportunities, aesthetic as well as functional. I've no intention of using this Volkswagen Caddy van as a campervan at all often. I haven't used a campsite for very many years. I've hardly left Sheffield for over ten years. How could I find the time? 


Tent camping was an interest over a long period of time but a long time ago. I've camped in a wide range of settings, in the Lake District and other parts of the UK, in various European countries, including the Irish Republic, and in Canada. Amongst my experiences, camping in bear country in Canada - a young bear did come near to my tent - this was at an organized campsite, not in the wilderness. I came to cross-country skiing in my thirties but I skied over a long period of time, with an interest in cross-country downhill. My best skiing was in the Derbyshire Peak District and the Yorkshire hills near here but I've skied in the Alps twice on cross-country skis. I travelled to the ski areas by train and when I arrived, I looked for a campsite and pitched my tent. I've camped without a tent on occasion. When I reached the Isle of Skye, I couldn't find a campsite before nightfall. I used the simple bivouac bag I had with me and slept in the open, on the soft heather.


This current project was nearing completion when the Coronavirus epidemic started. The project was halted, of course. Like the earlier project, this one involves changes to the van which can easily be reversed: the van can easily be used for transporting materials and all the other typical uses of a van as well as the typical uses for a campervan.


My Citroen Berlingo van was replaced in Spring 2020 by a Volkswagen Caddy. I began to work on a campervan conversion for the new van which made use of some of the features of the Berlingo conversion, such as the long, curved polycarbonate sheets but completely new features as well, in particular, vertical polycarbonate walls which form the 'inner ' of the campervan, the part which gives privacy. These polycarbonate walls are strengthened with wire mesh panels.


It took me a long time to arrive at this design but, after erecting the prototype - not at a campsite - it seems to me a very sound design, although there are minor issues which will need improvement. The design has  advantages over the Berlingo conversion, in particular the fact that the whole of the 'added structure' can be made self-supporting, after detaching the curved polycarbonate sheets at their upper end and anchoring them in the ground, a process which takes very little time. This isn't, obviously, a campervan which can be driven as a whole. Only the Caddy van itself can be driven. The structure which makes up the conversion has to be erected like a tent, but I've made improvements to the erection process used in the Berlingo conversion. The erection of the structure is easy.


A prototype will lack some of the features of the finished product (a 'finished product' can still be modified and improved.) This is the case here. In the trial run, I put in place the tall camping table and the aluminium bench which can be used for seating and for supporting a range of things, such as the portable stove I have, which runs on petrol.  Other camping eq The portable toilet, enclosed in a plastic storage container, was inside the van. I didn't put in place the camping mattress and sleeping bag. In this prototype, the oak flooring is without varnish. Varnishing will enhance its appearance but has no relevance to the design essentials, even though some aesthetic considerations in this case belong to the design essentials, together with the essentials of strength and safety. Amongst the essential improvements needed - eliminating the small gap between the two long curved polycarbonate sheets. A horizontal sheet, also supported by a wire mesh panel, protects the inner structure from rain. It wasn't put in place for this trial but has been used during preliminary work.


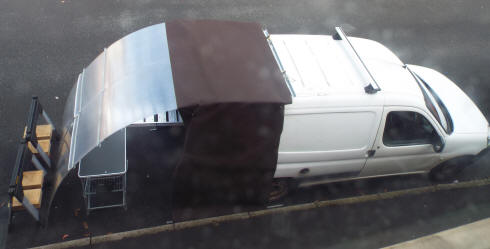
Above, the design near to completion, construction of prototype. The structures with four oak sections at the left of the image keep the rear of the curved polycarbonate sheets in place - here, the van is parked at the side of the road. At a campsite, ground anchors (or, alternatively, strong tent pegs) driven into the ground would serve the same purpose.


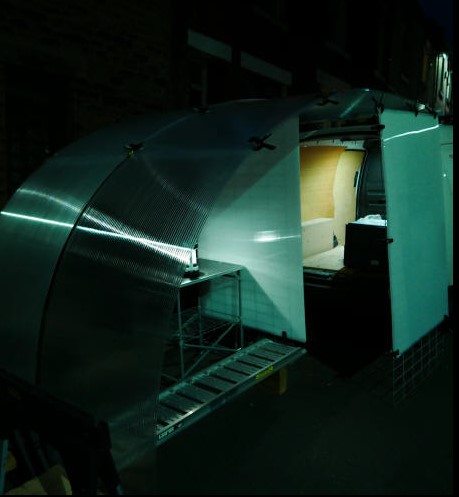
Above: at night, illumination provided by a lantern inside the van. The curved polycarbonate sheets aren't closed at the sides. The inner structure gives protection on three sides to the rear entry to the van. On two of the sides, not visible here, the open rear doors of the van provide protection, with additional protection provided by polycarbonate sheets. The third, longer side, can be seen here. Slightly sloping polycarbonate sheets form this side. The sheets can be moved in metal grooves on the ground, allowing access to the inner structure and the back of the van. The long aluminium structure, on two metal supports, has various uses. One use is as a long table. Another is for supplementary seating (a folding chair is also available.) There's another, higher table in the foreground. This is used as a stand for the cooking stove - the one I have uses unleaded petrol. There's storage space underneath it for cooking utensils and cooking indredients. Illumination is provided by an electric lantern, inside the inner structure here. I also have available a lantern which runs on unleaded petrol. Inside the inner structure, a portable toilet.


Above, another view of the parts shown in the image above. This image also shows one of the open vans, but not the polycarbonate sheet which is attached to the door. The inner structure can be erected very quickly after arrival at a camp site. It doesn't give a large available area, but it does provide a very useful area - complete privacy if needed - otherwise, some of  the polycarbonate sheets making up the longer wall can be opened - shelter from wind and rain, with the benifts of insulation from polycarbonate, room to stand, room to sit, ample space for sleeping. Sleeping is inside the van, using a camp mattress and sleeping bag, but most adults will be too tall to sleep in the van without feet, or more than feet, sticking out. This extension allows the tallest people to use the van for sleeping in comfort.


The curved polycarbonate extension, made up of four lengths of polycarbonate, is shown clearly here. The extension, which fits over the inner structure and is obviously much larger, can be fitted quickly, but, unlike the inner structure, not in high winds. (Once erected, though, it can withstand high winds.)


I've extensive experience of constructing buildings using polycarbonate sheets. I've learned the techniques necessary to build structures that do withstand high winds - not, of course winds which are exceptionally strong, the kind that can easily damage conventional buildings. For this extension, unlike the buildings which incorporate curved polycarbonate, the use of guy lines for added security is possible, advisable, in high winds. There are eight metal bars in four pairs, with bolts and nuts which when tightened allow the bars to grip the overlapping sheets and keep them together.


Guy lines can pass through spaces at the four outer ends and lead to the ground, where they're anchored with tent pegs or, on hard surfaces, an alternative anchoring system.



Despite the size of the extension, all the components fit neatly into the back of the van and take up very little space. The straight and curved polycarbonate sheets which are the main components for the design can even increase the general storage area - they allow other things to be stored more efficiently, more easily. The polycarbonate sheets also insulate the van when they are transported and stored, particularly the straight sheets at the sides and the top. A great deal of space is available for other things, including camping equipment, such as a portable toilet and the metal folding unit for food preparation and cooking - it can also be used for additional seating.


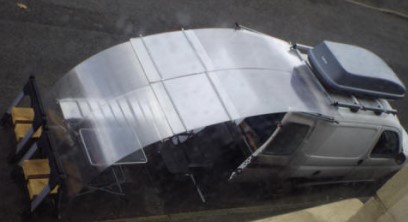
At the campsite, the curved polycarbonate sheets are secured by tent pegs or ground anchors, if the van can be parked on grass or some other soft or not too hard surface. If it's parked on concrete or some other very hard surface, then I have methods available for securing the lower parts of the polycarbonate sheets. On the street here, the curved polycarbonate sheets are kept in place with these trestles and oak blocks to give greater weight. 


Above, a view of the inside of the van, showing curved, clear polycarbonate sheets, which form the long curved section of the campervan, straight, opaque polycarbonate sheets at the side, which form the slightly sloping long side of the inner structure, and straight, clear polycarbonate sections, supported inside the van by crossed diagonals near the roof - these diagonals have another function, as tracks on the ground. The opaque polycarbonate sheets can be moved along these track, allowing entry into the inner structure.

The campervan can be used with the inner structure only erected, the curved polycarbonate as well as the inner structure erected - and, also without the inner structure or the curved polycarbonate used to form the extension. In this case, the van is used as it is, and the polycarbonate is stored in the wan. Sleeping is inside the van with the rear doors closed. Taller people will sleep in a diagonal position on the plywood base visible here, with a camping mattress to give greater comfort. The straight polycarbonate sections stored at the sides and the roof don't get in the way, but the curved polycorbonate sections certainly would get in the way. For sleeping in the van, the curved polycarbonate sheets are stored curving from the roof towards the front of the van, rather than in the position shown in the image above, curving from the roof towards the rear of the van. It takes only a very short time to rearrange them.


In the image at the top of this column, the roof box appears to be small in comparison with the size of the campervan extension. It is small in comparison, but the roof-box is one of the larger roof boxes, with a volume of 470 litres.


Photographic images, of course, are ways of capturing and preserving. The curved polycarbonate and the straight polycarbonate sheets of the campervan extension have a practical use but for me, they capture and preserve the architectural lines of the greenhouse I constructed in one of my allotments.


The campervan extension:


One of the polycarbonate extensions of the triangular greenhouse:
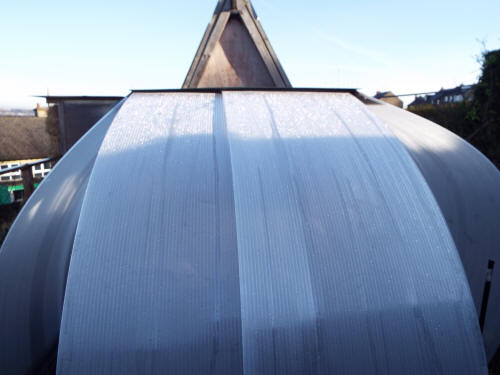


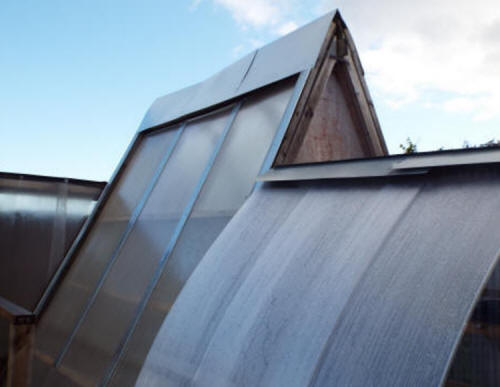
Another view of the greenhouse and one of the curved extensions. The greenhouse and these extensions have roofs of sheet metal. 


Unlike loose straw, straw bales aren't a significant fire risk. I've worked so hard at securing the allotments that intruders would find it very difficult to break in.


A new idea, which can potentially lead to a new design, is the start of a process which is usually very time consuming. Implementing a design may well need the buying of new components and tools and sometimes machinery. A new idea may be succeeded by a second or third idea. To make the design work, it may be necessary to come up with other ideas, to overcome obstacles which arise in the process of realizing the idea. A main idea may have to be abandoned, replaced by another idea, which may have to be abandoned as well. The van-campervan extension, described in the column to the right, started with an extension roof made of varnished plywood. The roof was quite heavy and it was essential to ensure that the roof couldn't possibly fall.

I don't share the common disdain for 'health and safety.' Some of the designs on the site are intended to be contributions to safety, for example the very simple design which makes use of plastic strips attached to the corners and edges of sheet metal to protect the user from injury, and the low-level sheet metal working bench which eliminates the dangers  of lifting heavy sheet metal sheets, particularly when one person carries out the lifting.


To ensure that the plywood was secure, I designed and constructed long metal supports, attached to the roof bars of the van. These metal supports projected beyond the rear of the van, a distance of a fraction under 1m. Regulations in this country permit loads which project by this distance, without the need to attach hazard warning signs. The metal supports were high enough not to be a danger even to tall people who walked under them.


I decided that although the system worked, it was too cumbersome. I replaced the plywood roof with a much longer roof made of polycarbonate. The final design makes use of this system. I spent a long time working on two side walls made of fabric, in this case, acrylic canvas. The fabric was kept in place with Neodymium magnets. Again, this system worked, and worked very well. I eventually abandoned it because of appearances - the fabric tended to look too crumpled to be acceptable - and practicality. The fabric excluded light, and the inner structure was too dark. (This was also an objection to the use of plywood, obviously light excluding.) Below, two views which show the way fabric was used in the design which was superseded, interior and exterior. The exterior view doesn't show the many small, circular magnets which pressed the fabric to the bodywork of the van.


I eventually adopted the system which still stands. The two rear doors are open, and supplemented with clear polycarbonate sheets attached to the doors. The sheets give more insulation than the fabric and allow much more light to enter.


Some of the techniques I used in the designs which were abandoned turned out to be very useful in implementing the  design I've adopted. The two long metal components, each of them made up of two sub-components, which supported the plywood roof turned out to be very useful. When shortened, so that they didn't project beyond the back of the van, they solved the problem of keeping in place the upper ends of the curved polycarbonate sheets. The sheets fit into a metal section which is the same, in essentials, as the longer metal sections. The Neodymium magnets I bought to keep the fabric pressed against the sides of the van keep in place the opaque ('opal') polycarbonate panels which are part of the inner structure. Magnets are used for fixing the line which supports the curtain at the front of the van, behind the driver's seat and passenger seat.

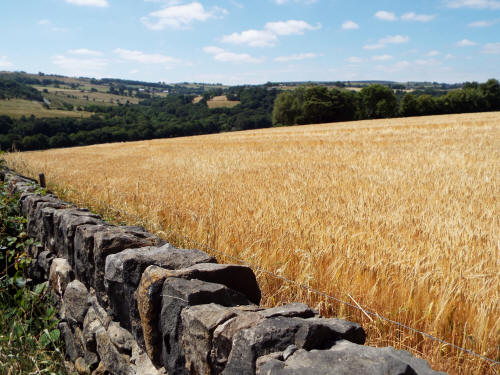


Above, field of gold: a field of barley, Loxley Valley Sheffield. This valley and other areas were devastated during the Great Sheffield Flood of 1864, after the Dale Dyke Dam gave way. An estimated 3 million cubic metres  of water swept down the Loxley Valley and through Loxley Village. The flood continued south from the River Loxley to  the River Don,  towards central Sheffield. More than 240 people were killed.


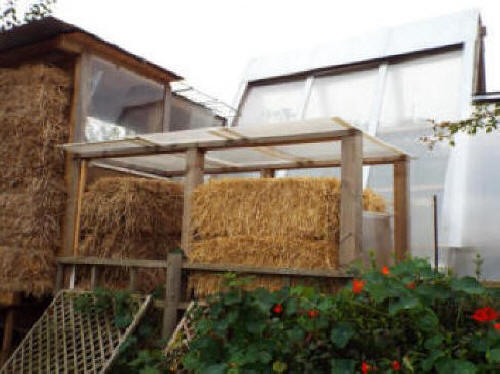
Above, to the left of my tall, triangular greenhouse in Sheffield, one of the extensions to the greenhouse, the 'thatched wall' constructed with barley straw bales. There's space for storage of straw bales under cover to the right.


Above, another view of the greenhouse extension.


Above, a newer view, with storage container and runner beans growing up canes

I'm only just a Northerner. I live in Sheffield, in the South West of Sheffield, where the countryside starts. The Midlands are very near and the South seems less remote than North Yorkshire. If 'Northerner' is accurate, 'thatched' isn't nearly as accurate and 'cottage' is way out. The building I've constructed isn't a cottage at all. It's an extension to the greenhouse I built and the extension isn't thatched. Thatch is a roofing material and this extension has a roof of sheet metal. The thatching material on this building is on a wall, or makes up one wall, not roof thatching but wall thatching.

I've an interest in straw bale building and when I made this extension, I decided to build two walls with straw bales, a wider wall and a narrower one. I did put the straw bales in place and the next stage was to apply lime plaster to the walls. I decided to keep only the narrower wall, to replace the wider straw bale wall with a wall of polycarbonate sheets and to omit the lime plaster.


This is what I hoped to achieve, and have achieved, I would think. Traditional thatch has a powerful appeal. It has a powerful appeal for me. But the colour of traditional thatch, rained on, exposed to the elements, is distant from the colour of the straw which was used.


For me, a field of ripe barley or wheat is one of the most magnificent sights of the countryside. There are farms very near here and farm after farm after that. Nearly all of them are sheep farms. The image at the beginning of this section is one of the few exceptions, of a field of ripe barley I found not very far from here.


There is a way of capturing the golden barley or the golden wheat, of having it there in one of my two allotments. Unlike the roofing material, this barley is protected by the overhanging roof. Its fading is very slow and the straw bales can easily be replaced when their gold is no longer enough.

I've seen to the practicalities. The wall is too short for the pattern of building which gives strength to a straw bale wall. I've secured the straw bales with strong wire, metal chain and baling twine, using, amongst other things, spiral ground anchors inserted into the straw bales, on the internal side of the structure.


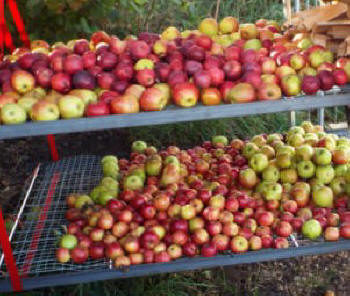
Another way in which a feature not belonging to a garden structure can be welcomed into a garden structure. The use of wood in domestic and not-domestic interiors interests me. In this garden structure, in the lower allotment, I made use of wood in an unexpected way. The wood hasn't been varnished yet but it still has presence, I think, as well as practicality, or past practicality - the structure was used for storing apples until I made arrangements for storing apples with greater capacity. The structure is open on one side but the wood is protected from harsh weather, unless the wind is blowing directly from the North.


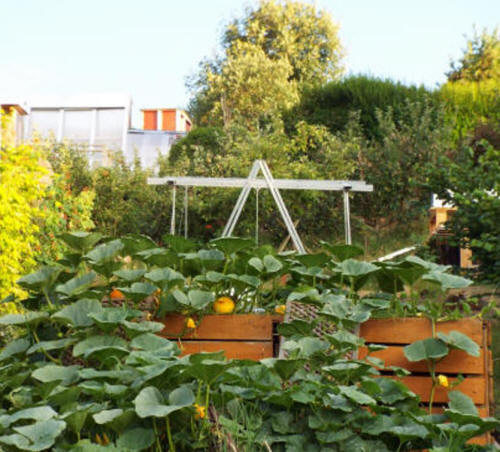
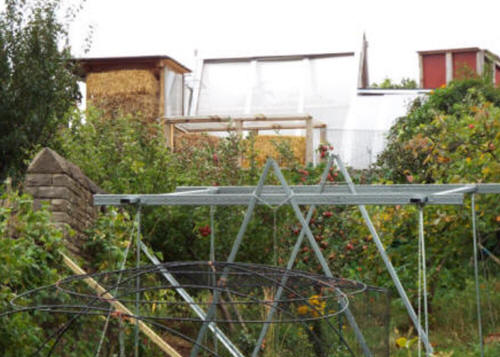
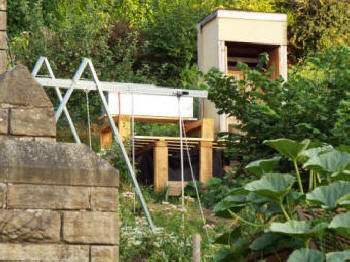
Below, a multi-purpose structure I constructed using aluminium components. The view of the upper part of the structure. In the background part of the greenhouse and the red-walled shed I constructed. In the foreground the wooden composter, usable as a solar composter, with a roof of polycarbonate sheet, but here with a wooden roof, supporting winter squash plants.


One of the uses for the structure is as a support for plants. Climbing plants such as runner beans and climbing French beans can be grown up the vertical metal supports and the chains which are part of the structure - more can be added for support of climbing plants. With additional horizontal components, it has been used for supporting broad bean plants and winter squash plants as well as perennial plants - raspberry plants.  extension structures. 


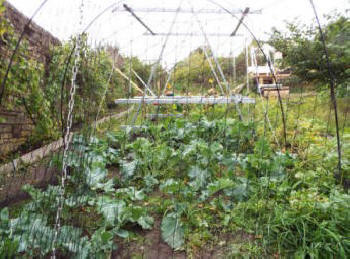
The structure is also used to support, on one side, an extension structure. Here, the extension structure is a roof constructed using fibreglass poles, formed into component circular structures. The roof is supported by fibreglass pole arches. The fibreglass structure is used to support netting to protect crops, eg winter brassicas: a cheap and effective way to construct a crop protection cage.


In the background, the triangular greenhouse, one of the curved polycarbonate extensions on the right, the shed on the right. On the left, the straw bale extension, in front of the triangular greenhouse a storage area for straw bales.

The year before, the aluminium structure itself was used to support the netting and the crops were grown inside the structure. The structure has a role in a 3 year rotation. Crops are now being grown in the land below the structure, using the fibreglass and netting extension and in the third year of the rotation, crops can be grown in the land above the structure, again using the fibreglass and netting extension.

The fibreglass poles have hollow centres. Cord can be inserted into the space to help to keep the poles together. I achieve the same purpose with strong wire threaded into the poles. The poles are already strong but the wire strengthens them further.


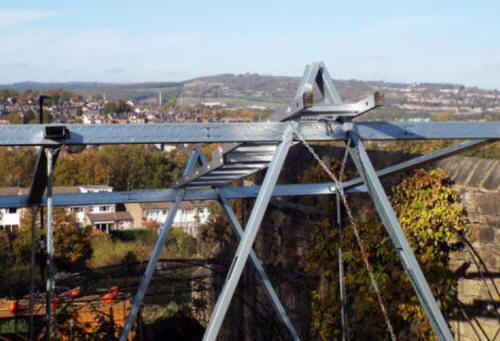
This more recent photograph shows the aluminium ladder I installed in the roof of the structure. The structure was already a strong one - the triangular arrangement of the supports is inherently strong - but the ladder increases the strength further. In the background: Sheffield, including the Hillsborough football stadium, which isn't far from the allotments.


More pictures of the structure and extension. Protection of brassicas:


Part of the structure with view of another miltipurpose structure with extensions, the tall structure shown above, now with extensions, not all shown here. The galvanized container is for water storage and was also designed as part of a hydraulic system for pressing apples. The extensions include areas for container growing of crops - all the lettuce grown on the site is here - and for storage, including apple storage.


Under one of the areas for container growing, one of the areas for storage of crops:


There's also space for storage and air-drying of wood, for use in the wood-burning oven in the upper allotment. The oven has an outer surface of curved sheet metal and has high thermal mass, given by the fire bricks. The oven has space for storage and drying of wood, in this case, not air drying but drying accelerated by the heat from the oven.


The aluminium structure: some of the protective netting of the extension:


The fibreglass poles which form the roof of the extension are bent into 5 linked intersecting circles. The geometry is modified by the forces on them.


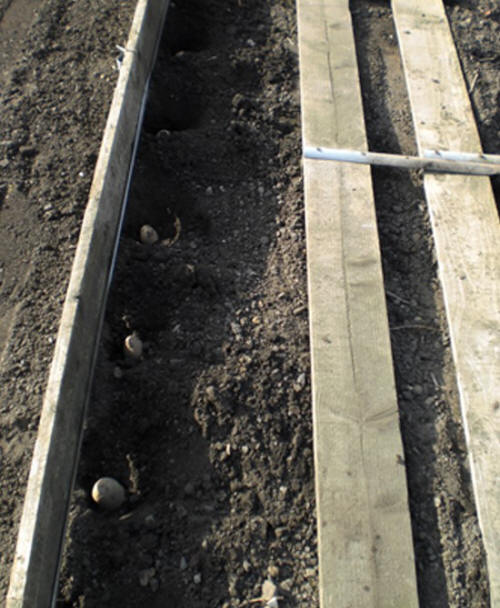
Rectangular beds in my allotments are generally surrounded by boards, unless the bed has a wall at one side, the wall making one of the boundaries. These aren't the fixed boards of conventional systems. The boards are supported by metal stakes so that the boards can easily be moved: a system which provides very great flexibility, allowing beds to be increased or decreased in size, or rectangular beds to be replaced with an 'open plan' arrangement.


The boards here are supported by stakes. There are curved fibreglass supports against the wall, some of them visible here. These support runner beans and Borlotti beans. Plants have begun to climb the supports. The large bed is used here to grow potatoes (variety Kestrel, second early.) This is a non-standard form of the bed and board system.


The system shown clearly. Planting of a potato bed. The seed potatoes in a bed with boards in position on one side. The boards which will be placed on the opposite side of this bed or as part of another bed shown on their sides, with stakes attached.


Uses for an allotment earthwork


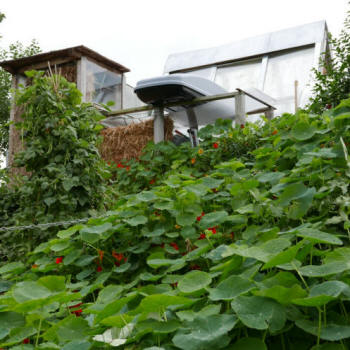
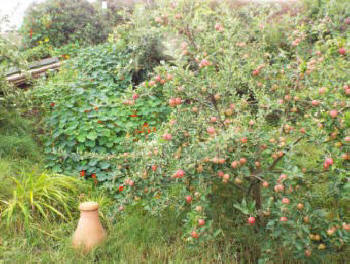
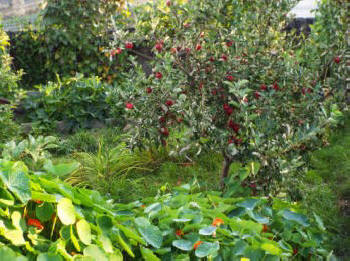
Civil engineers, as well  as labourers, have often constructed earthworks for one purpose or another, and the earthworks have generally been large, enormous or stupendous. Below are two views of the same very modest earthwork in my lower allotment. You'll see that the nasturtium plants, with their red or orange flowers, are growing on a mound, which is higher than it looks in the first image. The second image, taken from above, does more justice to it. The mound is near the wooden walkway which leads from the gate of the lower allotment. The walkway was constructed to solve a problem, the fact that the area here became a muddy morass after heavy rain. There's still a narrow path next to the walkway, which can be used as an alternative to the walkway and the walkway is next to the path. Other things in the images. In the first image, there's a cider apple tree (variety Dabinett) and in the second image there's an early apple tree (variety Katy, otherwise known as Katja.)


The Nasturtium plants (Tropaeolum majus) are very useful, although one of the reasons why I planted them was their attractiveness. The bare soil of the earthwork would have been colonized by weeds but the dense foliage of the Nasturtium plants smothers them effectively. They self-seed and so are renewed each year. The leaves are also edible - better stir-friend, I think, rather than eaten raw in salads.


The earthwork does have one feature which makes it an unusual earthwork, I think. It was devised as a conscious composting method. I don't favour composting in a standard composting bin, whether timber or plastic. Even the four-sided wooden composting bin I designed and built has an unusual feature.


The practice of earthwork composting has more than one benefit. It reduces the amount of material needed to construct an earthwork of a given size and in the process processes - composts - material which is unsuitable for standard composting.


The allotments at this site generally have hedges and the hedges are of privet. Privet is a fast growing plant and it's better not to trime the privet bushes during the bird nesting season. At busy times of year, keeping privet in check is often not a priority in any case. The end result is that privet hedges can grow tall and when, eventually, they are trimmed, the trimmings aren't dainty things but include many long, thick stems.


In his book on organic gardening, Lawrence D. Hills of the Henry Doubleday Research Association claimed that stems thicker than a pencil won't decay in a compost heap. This isn't true, of course - all of them will decay in time, but the time involved is prohibitively long.


The time isn't prohibitively long in the case of an earthwork composter. The earthwork is intended to be a permanent feature of the landscape. The stems in their undecayed, uncomposted state contribute to the bulk of the earthwork. When, like the thinner stems, they do break down, they make a contribution to the fertility of the soil, even if a very minor one - woody material isn't an important contributor to fertile soil.


The large amount of privet material I had available at the time was no longer a problem now - I could use all of it to build up the earthwork. I did have to add other materials, of course - soil from another part of the allotment, and manure.


It has sunk quite a lot since I constructed it. I haven't topped it up at all. Eventually, I will have to. It's still high enough to count as an earthwork. This, then, is the PHD earthwork composter. Next, I turn to the PHD solar composter.


A higher earthwork is planned for an area at the bottom of the lower allotment, an ugly area smothered in rampant brambles which are smothered in turn by bindweed, the boundary here between my allotment and a neigbour's allotment. It does nothing for the view from the other side of the allotment of the pond and a weeping birch tree. Replacing the brambles with a hedge of beech or even gorse would be difficult. The easiest way is to build an earthwork over the brambles, so that they can decay at their leisure. I've already begun to pile manure on the brambles. This is an area very near to the delivery area for manure. A farmer from a farm not far away can deliver large quantities of manure, using the front-loading bucket on his tractor. Large quantities of topsoil can be delivered here too. In my experience, the topsoil for sale in bulk isn't fertile soil at all, but fertile soil isn't needed for this purpose. In fact, large quantities of infertile soil are needed to counteract the manure, given that I intend to plant Nasturtiums on the earthwork and Nasturtiums thrive in relatively infertile soil. The site is less sunny than the ideal, but not too badly off.

 
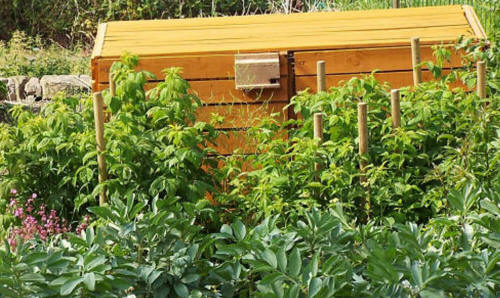
I still use this wooden composter. Although wooden composters are affected by moisture (including heavy rain) they can have visual impact as well as being useful. The wooden boards which make up the top of the composter can be replaced with a polycarbonate or PVC surface to convert it into a solar composter - a composter which uses the heating effect of solar radiation to convert compostable materials into compost more quickly.


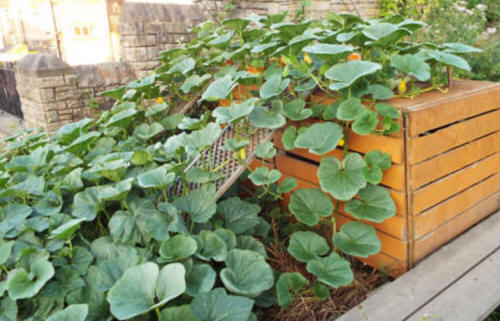
Here, the composter is used to support a winter squash plant:


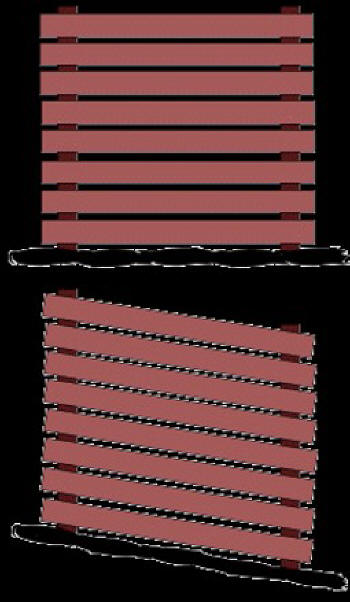
This design has the advantage that it can be used on sloping ground, maintaining vertical sides - this is achieved by loosening and tighening bolts which are part of the structure.


The conventional designs, of course, lean at an angle when placed on sloping ground.


Now, I use an improved solar composter, with a greater surface area of light transmitting material, shown in the  image below, although the operating principles are the same. The composter above is still used as a composter, a non-solar composter. The upper surface is now of timber, not plastic. A solid surface of this size has practical advantages. One of the main ones is as a support for winter squashes. This area next to the composter is very near to the delivery area I've set aside for manure. This area, so easily enriched with manure, is a very suitable one for growing these winter squashes.


The most recent manifestation of the solar composter makes use of the material I use so often, polycarbonate sheet, used curved rather than straight. In this form, it withstands winds easily. The long black container visible at the lower end of the polycarbonate sheet is to collect rainwater. This polycarbonate sheet is yet another water collecting surface. There's a flat plastic carbonate sheet on the right side, for insulation. The left side is open here. On the left of the solar composter is a small Bramley apple tree. On the right is a small Dabinett cider apple tree. These two trees are the most recent of the apple trees I've planted in the allotments. These two trees are in the upper allotment. All the other apple trees are in the lower allotment.


What are the benefits of a solar composter? In a greenhouse, the temperature is raised by the well-known greenhouse effect. Visible light transmitted through the transparent or translucent walls of the greenhouse is absorbed by plants and the soil and converted into heat energy, which is emitted in the form of infrared radiation. Radiation in this part of the spectrum isn't able to penetrate the glass or plastic surface. As the radiation remains within the greenhouse, there's a raising of temperature inside the spectrum. This temperature increase favours increased plant growth (unless the outside temperature is high, in which case temperatures may be too high for some plants or all of the plants in the greenhouse.)


The organisms which are involved in the biochemical processes which lead to the breakdown of composting materials aren't able to work in lower temperature conditions. Just as a greenhouse increases the rate of plant growth and lengthens the growing season, a solar composter increases the rate of compost production and lengthens the composting season.


Greenhouses work based on a physical principle called “the greenhouse effect.” In a greenhouse sunlight—which is made up of different wavelengths, some of which are in the visible and infrared spectrum—shines through the transparent glass or plastic roof and walls. Only the light in the visible spectrum can penetrate into the greenhouse whereas incoming infrared light, which is also known as heat radiation, is blocked by the glass or plastic. Inside the greenhouse the visible light is absorbed by the plants and soil and is converted into heat, which is then emitted by the plants and soil in form of infrared radiation. Because that heat radiation is blocked by the glass, most of it cannot escape, and the temperatures inside the greenhouse will steadily increase.


Wooden composters are common but have the disadvantage that the materials in the composter are moist - if the moisture level is insufficient, composting processes can't occur. Polycarbonate isn't affected by water in this way.

In the polycarbonate solar composter shown above, the far end of the composter is without a wall. The composter is placed next to a large hedge of ivy, which grows very prolifically. As the ivy grows into the composter, it adds to the composting materials available. A four-sided composter should be avoided where possible (I can defend the wooden composter I describe above - it has uses other than composting.) Placing the composter next to a hedge gives advantages but I also make use of hedge composting - composting without any structure, using simply the base of the hedge as the composting area. There's a very useful hedge composter at the top of the lower allotment. It's situated in a very convenient location. It's easy to throw compost materials onto it from the path higher up - I sometimes think of this as 'throwaway composting.' Another advantage is that the hedge is a privet hedge and the compost material helps to check the growth of the privet - hedges grow outwards as well as upwards, and outward growth of the privet hedge contributes to the compostable material.


The PHD solar woodstore


A solar wood store makes use of the greenhouse effect to increase the environmental temperature, and so increase the rate of moisture loss from chopped and sawn wood - the process called 'seasoning.' It also protects the wood inside from rain. I make use of corrugated PVC here rather than polycarbonate sheets. The wood, and the sheets, are supported by scaffold boards. The scaffold boards at the left side, out of sight in this photograph, are supported in turn by an outside bench I constructed for out of doors woodworking. It's useful for activities which create harmful wood dust, including routing and power sawing, including jigsaw use. The workbench also supports the equipment I constructed for steam bending of wood and the chainsaw holding equipment I constructed for safer chainsaw use for repetitive processes.


The solar woodstore and the bench are in my small backyard. When I moved into the house I had no interest in gardening but before very long, I made a garden, using leafmould I made and quantities of bought material. I grew a wide variety of vegetables, not on a large scale, of course, until the two allotments I took on made it unnecessary. I did plant a plum tree (variety: opal) in the centre of the garden and installed a small pond - the rectangular container is a galvanized one bought from an agricultural merchant.

The wood in the woodstore has been obtained from the wood delivered in the form of sections of tree trunk, wood in bulk form, sawn using a  chainsaw and cut with an axe.


I use an informal approach here. If you decide to look further, you won't have the impression that you're following anything like a systematic survey. The  designs aren't grouped according to sphere.  The designs are very varied and the level of detail provided is very varied too. In almost every case, there's information available on other pages.


The other pages give information about a large number of designs. Links are provided to these pages. Material on the site tends to be highly dispersed and this is the case here.


Obviously, in all the projects - all the projects which make up the Project, PHD - I'm not following instructions. There's nothing and nobody to inform me that I should use M10 80mm bolts for one purpose in the thing I'm constructing and M8 50mm bolts for another purpose, and similarly for any other fixings I use, any other components I use. I have to decide what I should use, usually after many hours of research in print catalogues and the Websites of suppliers of woodworking materials, metalworking materials, and suppliers of so much else. I have to do research and buy alternatives if the things I've bought turn out not to be suitable for the purpose - very often, they do turn out to have a use in new projects.


Very often, I use components and materials for something other than the intended use. I've been buying from a large supplier of fencing materials for many years and never used any of them actually for fencing. To give one example, the bars I use for keeping the overlapping polycarbonate sheets together in my van-campervan extension were bought at this supplier of fencing equipment, a use which has nothing to do with their intended use in fencing, as stretcher bars. For my application, each longer bar is sawn to make two equal lengths.


The PHD A-frame support and crane


There are various ways of constructing systems for storing wood at the level of the small or medium-sized workshop. Storing the wood in a pile on the floor takes the least work and has obvious disadvantages. Constructing shelving strong enough to do the job takes much more work than the work needed to make this A-frame wood store, which allows some wood to be stored horizontally, such as the oak blocks below, and some in a vertical or near-vertical position. I think that the A-frame, has more presence than shelving .


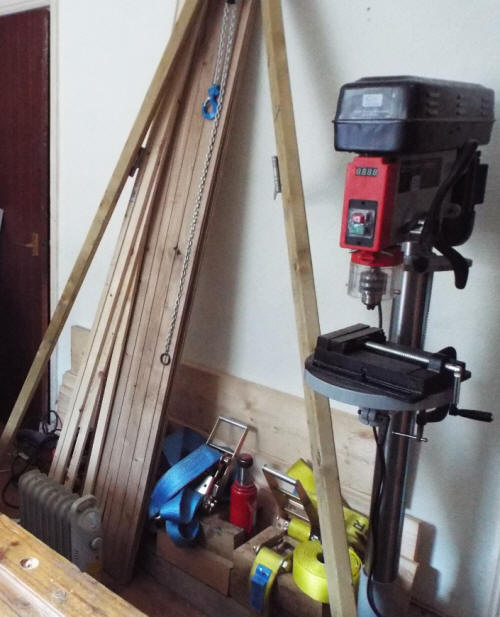
'This is a structure for storing wood to be used in woodworking which is very easy to construct and install. The two diagonal members are fixed at the top simply with a screw (a woodworking joint can also be used) and connected lower down by the short horizontal member. The A-frame simply leans against the wall, without any need for a fixing to keep it in place against the wall. Its weight is sufficient. Here, there are sections of oak sleeper and other wood stored in the lower part of the A-frame, resting on the floor. There are long sections of timber stored more or less vertically. The two hinges which are visible, pointing towards the wall, can only open inwards, allowing new pieces of wood to be put into the A-frame but preventing them  from falling outwards.


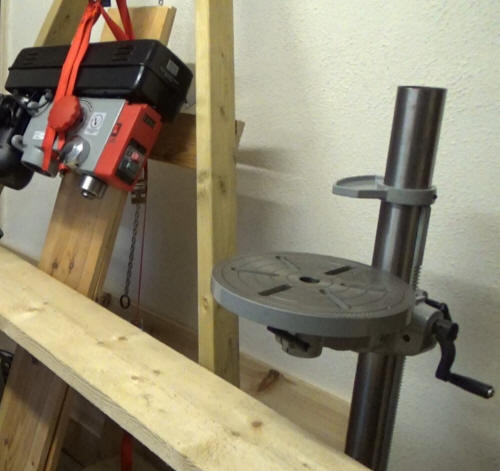
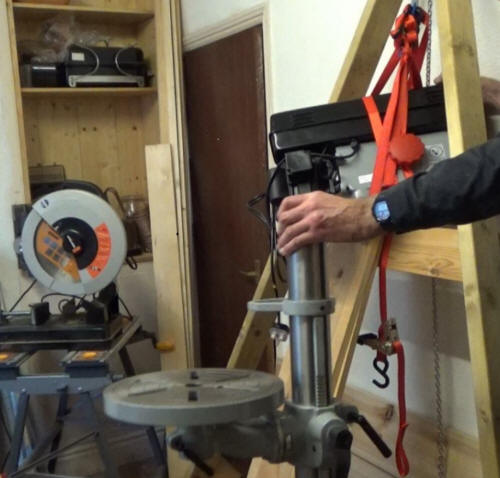
I found another use for the structure. I bought a floor pillar drill to replace my old bench-mounted pillar drill. To assemble the drill required lifting it and fitting it onto the column. The assembly instructions: Danger / Caution  Due to the weight of the head, at least 2 persons are required to safely fit it to the column. Lifting the head was out of the question for me and so was fitting the head of the pillar drill onto the column. I was working on my own, I overcame the problem by converting the wood storage structure into a simple crane. I attached a hoist to the apex of the structure and attached the pillar drill head to the hoist with strong polyester webbing. By operating the lever of the hoist, I could life the head easily and I managed to fit it onto the column after all. After that, the structure reverted to its previous use.


The pillar drill, complete with head, and the wood storage structure, with the chains of the hoist still attached.


PHD is a project, not a business. I haven't the time to run a business. I've an understanding of the obvious importance of finance but no interest in financial details. Appointment of a financial specialist would be out of the question.

I design with the materials listed in the section at the top of this column but design work is one activity out of many.


 I don't have the time to document my work very thoroughly, in the design pages of this Website.  Some of the documentation is quite thorough, some of it is anything but thorough, and in some cases there's no documentation at all or next to none.


These PHD designs are contributions to different, sometimes very different, spheres, including:


Web navigation, such as the rail, the blue band to the left, which allows the user to reach top of page very easily from any point in the page, even when the pages are very long. This innovation and related innovations are discussed at Page Travel.

There's further information on the more comprehensive page Web Design.


Gardening and growing, in many different areas of gardening and growing. The page gardening photographs is a general introduction to some of them, with links to pages on particular subjects, such as composting, plant support and the use of beds and boards in gardening.


Miscellaneous designs.  All of them have this in common: they've required the tools and machines of my workshop.


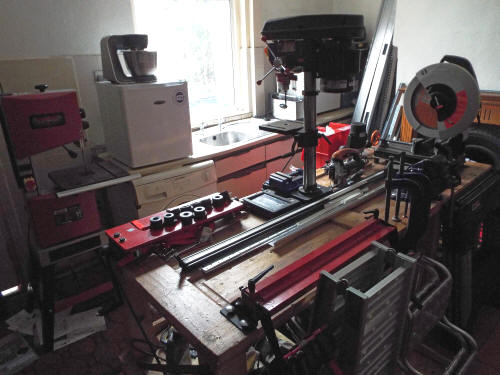
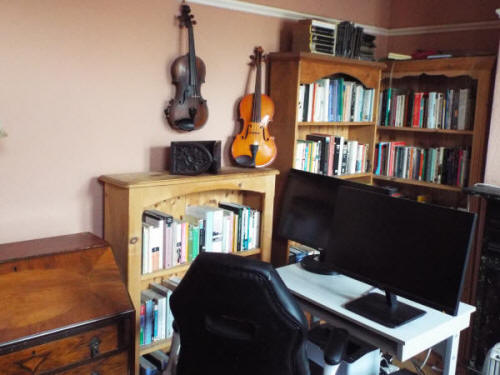
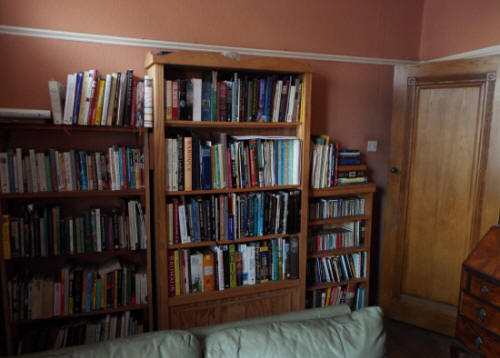
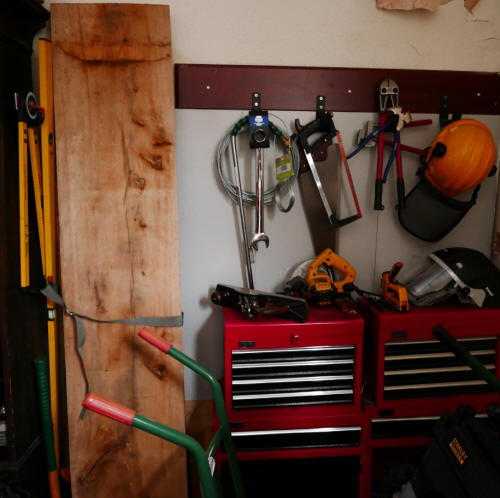
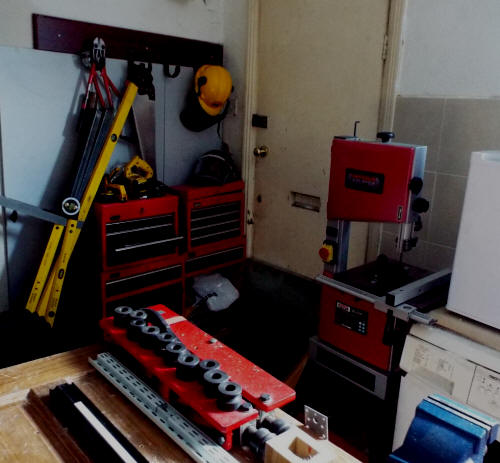
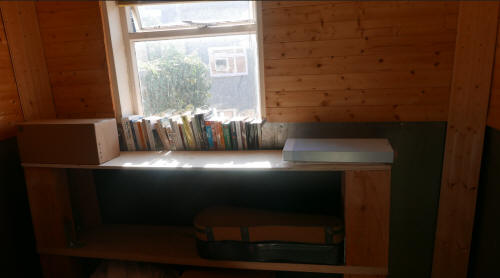
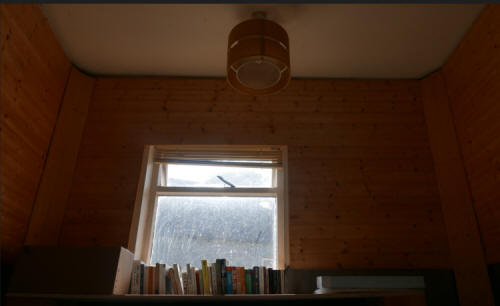
Below, a view of my small workshop, or some of it, but not a recent view,  and three views of the adjoining small room where I have my computer desk, again, not a recent view.  The two large monitors are needed for the wide pages I favour and for the practice of Large Page Design. The bookshelves shown - others out of sight - are an indication of my interest in the printed word  (I try to support it as much as I can, and by buying newspapers and magazines as well as books, regularly and very often.)


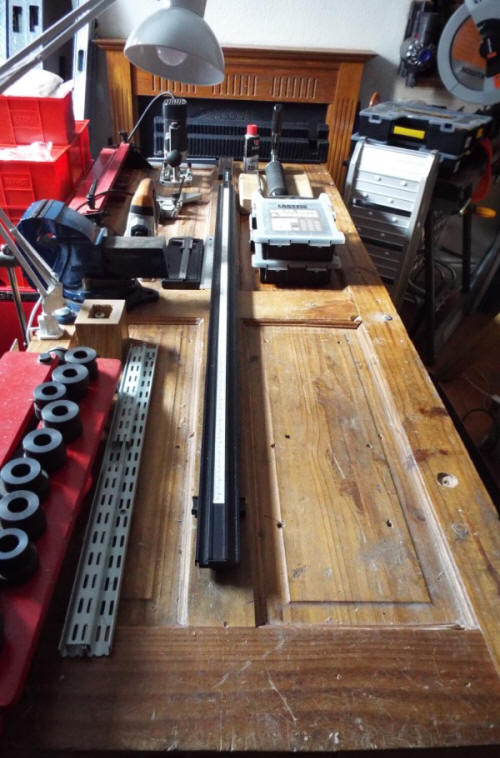
The workbench which is prominent in the image of my workshop, above, was designed and constructed very quickly. There were no changes of direction, no radical revisions.  Other views of the workbench (the recycled door has served its purpose but I've bought two slabs of beech as a replacement, to be installed after planing of the beech wood.


Above, left: one of the two high-quality beech boards (the other board is behind this one) intended to replace the wooden door which at the moment forms the top of the workbench. To the right, standing on the left storage cabinet, the plane to be used for forming a level, smooth surface. The plane is manufactured here in Sheffield.


It has substantial advantages, I think.


It's a solid platform for working, one which never vibrates or moves in the slightest.


It's easily constructed. There are no woodworking joints involved in its construction. The supporting uprights are simply sections of oak sleepers. I have a bandsaw now which enables me to saw oak of these dimensions but not at the time I constructed the bench. The supplier of the oak did the work of sawing for me.


It's easily dismantled for moving to a different location. The fixings are bolts and nuts. Two of the bolt heads are visible in the photo above, attaching the two uprights furthest from the camera. The fact that the oak sections are broad contributes to the stability of the bench. Four of the uprights have holes in the base. One end of the bench can be raised with a hydraulic jack and two castors with stems put in place by pushing the stems into the holes. The procedure is repeated at the opposite end and then the heavy bench can be pushed to a different location.


The bench has a great deal of storage space underneath the work surface. The cords of electrical equipment stored on top of the bench - I store my router and jigsaw on top - go to the stage below, shown in the photograph below. Most electrical equipment is stored on the stage underneath the bench. I have a chainsaw, hot air gun, belt sander, rotary orbit sander and mains drill stored there (most of my drilling work is carried out using a portable drill or the floor standing drill press.) Some of the equipment is visible in the photograph above. The cords of the equipment go to the level below the stage, the floor level.


One very important piece of equipment is too large to fit on the stage. It rests on the floor. This is the dust extraction equipment I use. I also use a powered respirator, bought after exposure to the dust from oak wood brought a reaction.


The photograph above was taken after tidying. The appearance of the pre-tidying equipment was very different, including entangled cords.


The horizontal wooden boards at the base of the bench are inset, so that I don't have to stand at a distance from the bench. The space at the base of the bench accommodates feet, eliminating any awkwardness which might reduce the immediacy of the experience - the experience of being at one with the wood or the metal which is being worked.


The bench suits my circumstances and way of working completely. It wouldn't suit everyone, of course. I store far more on top of the bench than many people by necessity. I'm very short of storage space in the workshop, but I also like to have some of the equipment at least very close by. The surface of the bench is an old door. The recessed panels of the door prevent items in the recesses from being mislaid or dropped on the floor. I have a work table in another room for work which needs a smooth, flat surface. The surface is made of unlovely MDF. The door is easily replaced. The existing door-surface is looking quite battered now and I intend to cover it with a newer door. A newer door can be given the benefit of varnish, which I never applied to this door. The ready availability of doors is another factor which gives this design such ease of construction.  The dimensions of the bench are L x W x H  197 x 74 x 85 cm.


The workshop includes some equipment manufactured in Sheffield, in the case of the metalworking swivel vice, a long time ago - a Record No. 3 vice, solid and completely dependable, but with other virtues and advantages. A Lynx saw made by E Garlick and son and a square manufactured by Marples - examples of the outstanding tools still manufactured here.


PHD also includes graphic design and concrete poetics   Both fields are about designing with words and / or images, or using words, placed on a surface, as a form of image. The introduction to my page on concrete poetics:


Graphic design, like other branches of design, is amongst other things the art of placing: graphic design is the art of placing words and images (or only words or only images) on a two dimensional surface (such as paper or a computer screen) to produce a desired effect with as much effectiveness as possible. The desired effect includes these: to persuade (for example to bring about a political choice or a consumer choice, such as to buy something) or to inspire (in the common routine meaning of the word or a better meaning), to convey beauty or to convey harshness - this is a world which contains both beauty and harshness, of course, as well as so many other strongly marked contrasts.

The art of concrete poetry, and the world of concrete poetics, is likely to be unfamiliar to most graphic designers, but I'd claim that graphic designers would benefit by studying the subject - if the demands on their time allow. The fields of graphic design and concrete poetics overlap to a very great extent - the linkages between them are very considerable, even if the contrasts are striking. Amongst the contrasts are these: the desired effect of concrete poetics hasn't so far included advertising of products and isn't likely to in the future. Concrete poetics rarely includes images, although some of my concrete poems do. But concrete poetry uses the placing of words on a page (paper page or computer page or 'page' made of stone or other materials) to convey an image, explicitly or implicitly. Amongst the linkages between graphic design and concrete poetics: concrete poetry, like graphic design, can convey a very wide variety of emotional states and responses to the world, including the world of human experience, including beauty and harshness.


Below, PHD interior design - the use of cheap, readily available materials. The bedroom, with thin, mass-market softwood panels in the upper area. Below the panelling, there's sheet metal I had available. The other walls similarly finished.


Email 

  PHD: Paul Hurt Design and Construction  Archived material